
How to Make a Wooden Wedding Ring
Jul 01, 2014
I suppose this article could be titled “How to make a wooden ring” since there is nothing particularly wedding-specific about it, but for me and most guys, a wedding ring is the only ring we wear. Wedding rings are great, because they tell other women to leave you alone. This is beneficial for a marriage.
I decided to make a wooden ring for a number of reasons. Firstly, when I got married my wife’s grandmother owned a jewelry store and that is where we both got our rings from. However, my ring didn’t have any personal significance. Actually, the one I have now is probably my 3rd ring. Also, about a year ago I started to get slight carpal tunnel feelings in my hands from all of the typing I do. Some people describe it as a cold sensation. I noticed my wedding ring began to feel cold and heavy and so I stopped wearing it for quite some time. I wanted to make a wooden one anyhow but it took a while to get around to it. Lastly, every ring I have had always felt like jewelry and I wanted something more masculine. Now, I have a few wooden ones and can easily knock out a few more. Each has its own unique characteristic and the significance of being made by myself. How manly!
Update: This article has become one of the most read on Wolf & Iron! Thanks! As a result of the success and having people ask about the wooden rings I wear, I am launching a new venture, Rustic and Main: Heirloom-quality wooden rings and other distinguished goods. Head over to rusticandmain.com and sign up to learn more or see more information at the bottom of this article!
How to Make a Wooden Ring
Tools and Supplies you’ll need:
- Wood (more on that below)
- A Saw (Hacksaw, scroll saw, or band saw, etc.)
- Speedbor wood bit or Large diameter drill bit and Electric Drill.
- Vice
- Dremel tool
- Sandpaper (100-120 grit) and\or Belt sander
- Tung Oil (optional)
- Heat gun (optional)
Choosing the Wood
The first step in making a wood ring is choosing the right wood. Since the ring will be fairly thin you’ll want to choose a fairly dense and strong wood. In the illustrations below I am using African Padauk which has a deep orange or reddish color that will turn a warm brown over time with exposure to UV light. I have also used Ipe (ee-pay) which is a Brazilian Walnut and has a darker color as would be expected. Local wood supply stores usually have a bin of exotic wood billets which are perfect for these projects. These woods have great properties and are not expensive at all. You could make a hundred rings for around $5. You can’t always tell the type of wood you are getting, though, so just try and go for the darker pieces which is generally heart wood. Ipe, for example, is so dense it will actually sink in water. It’s an excellent wood for making bows as well.
Step 1: Cut out the ring blanks with the grain
As stated earlier, the rings will end up being fairly thin. If you don’t respect the grain, you will likely crack the ring during some stage of the process.
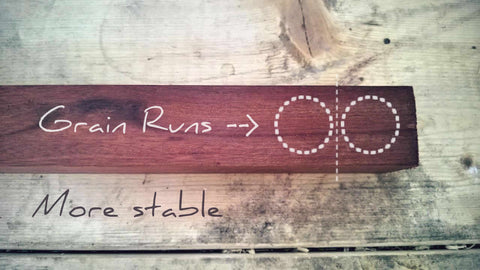
Cut out the ring blanks from the billet so the grain runs across it, not through it.
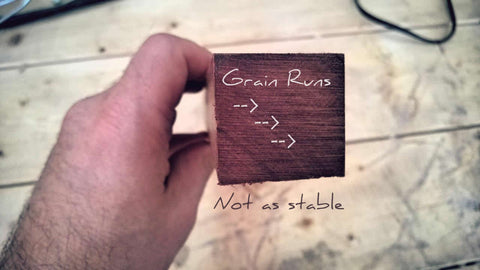
If you try and create a ring by slicing off an end of the wood, it will likely crack.
Step 2: Measure and cut the ring blanks
Depending on how the billet grain is situated you can either cut one long 3/8″ strip from the wood and then cut that into 1 3/8″ size blocks, or cut a few at a time from the end as I did below. I chose this option because I may use the billet for something else and didn’t want to lose the width of the wood.
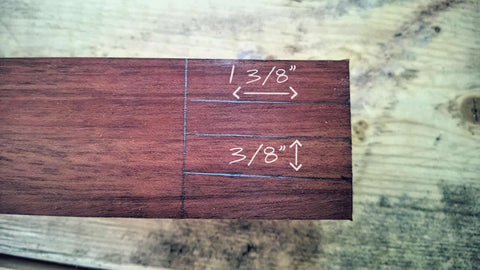
Measurements are approximate. Make sure to add extra width for the sanding process.
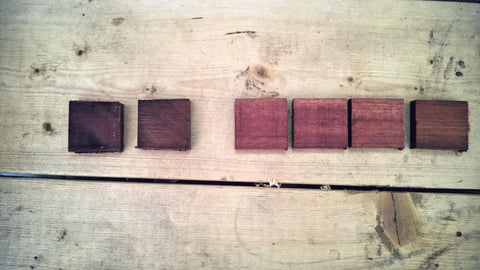
The ring blanks on the left are cut across the grain. They both cracked during the drilling step.
Step 3: Drill the hole
If you already have a ring, then use a Speedbor or drill bit that is a little smaller than its hole. If not, you can guestimate and use a Dremel tool or sand to get it just right. I think I have a size 10 ring finger, and a 3/4″ bit seems to be a good starting point.
Note: Only drill about half way though and then flip the block over. Otherwise, the wood on the backside may chip. Go slow and let the bit do the work.
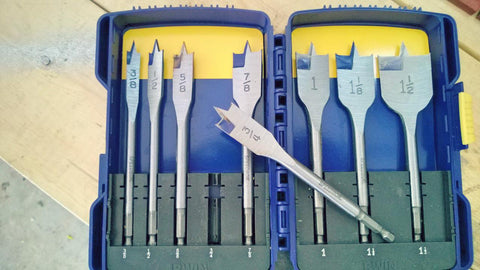
For a size 10 ring finger, a 3/4″ bit seems to be a good starting point.

Go slow and don’t provide too much pressure. Rock the drill back and forth a bit if necessary.
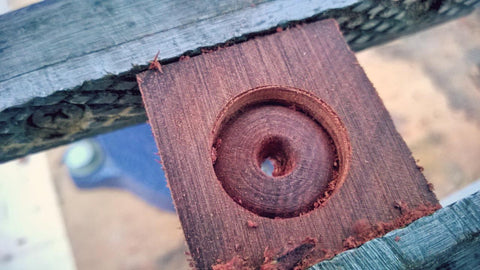
Notice how the blank grains are lined up with the pressure of the vice. Flip before going through all the way.
Continue drilling on back.

Don’t put it on your finger yet!
Step 4: Sand the hole to fit
Using a Dremel tool, sand down the hole. I have mine in a vice grip, mainly so I could take the picture. Remember, don’t force the wood on the finger. It should slide over the knuckle fairly easily.
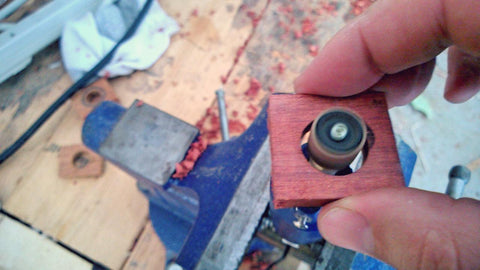
Sand the hole to fit your finger.
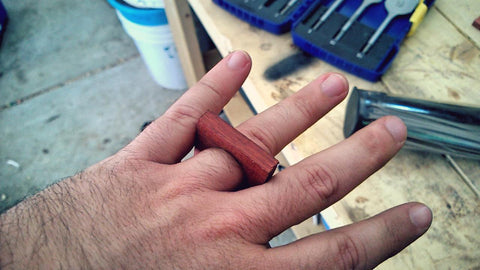
It should slide on easily.
Step 5: Freehand the ring outer diameter and cut off the corners
I find it easier to freehand the outer circle of the ring but I suppose you can use a scribe or something similar. Cut off the corners to save time on sanding.
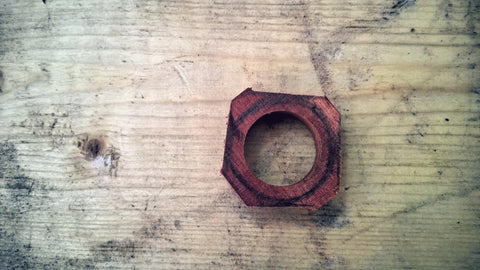
Freehand the diameter of the ring and cut off the angles.
Step 6: Sanding and more sanding
This is the most tedious step and where you have to be the most careful. Remember, you can’t put the wood back on. If sanding by hand, this step is really going to take a while because the woods are much more dense than say, pine. You may want to get a little creative here.
If using a belt sander, just be sure to keep the ring moving so one side doesn’t get a flat spot, and go slowly.

Eyeball the ring as it is being sanded to get it close to the line you drew.
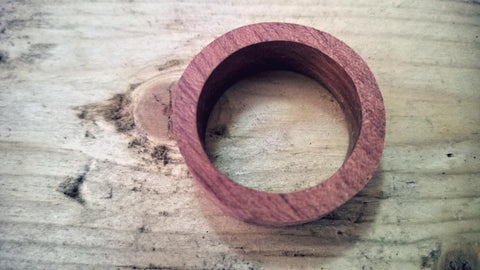
Once the ring has been sanded down fairly round, do the rest by hand or back to the belt sander. Finish by beveling the inside and outside edges.
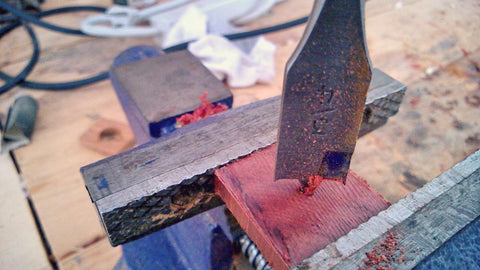
Step 7 (optional): Heat treat (temper) the ring
Once the ring is near its final shape, you can heat temper it using a heat gun or possibly another heat source. It has to get hot enough to get a little smoke going.
Heat tempering wood can strengthen it by causing the wood cells to constrict. It also looks cool to have a bit of burn on the edges. Too much, however, can make the wood brittle. Once a little darkness begins to form, flip it over and get the other side. Have some Tung oil (or other) on hand to cool it down.
Note: Heat treating can cause the ring to shrink a bit. After it has cooled down, slowly try to put it back on. Sand it down with the Dremel as necessary.

Heat treat (temper) the ring. If it starts to smoke or black forms, you may want to dip it in oil to cool.
Step 8 (optional): Final sanding and coat with oil
For this step I have chosen to use Tung oil because that is what I had lying around. Linseed or another drying oil could also be used. If you want to skip this step, the natural oils of your hands will likely coat the ring over time. However, exposure to harsh shampoos and other detergents may undo this.
Tung oil will dry to a plastic like consistency, filling in the natural pores of the wood while still allowing the natural color and grain to show through.
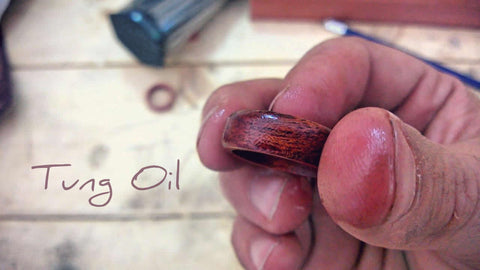
Coat the ring with oil and rub it in for a few seconds. You can do multiple coats if you like.
Step 9: Wear with pride
You now have a handmade ring that fits your personality, shows you have manly woodworking skills, and most importantly, ensigns your love and commitment to your wife.
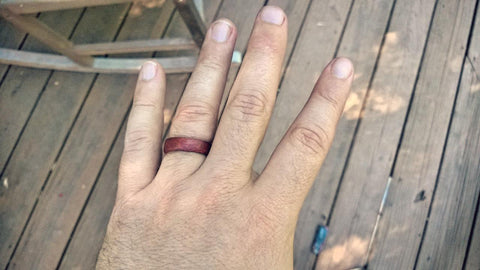
The wood really brings out the hair on my knuckles!

Three rings I have made thus far. The middle is Ipe (ee-pay) and the others are African Padauk.
Rustic and Main
I have had a lot of people reach out to me with interest in the wooden rings I wear and have made a few for other people. I have decided to use the creation of wooden rings as a starting point for a new venture called Rustic and Main. Like many, I find myself in a place where I enjoy the rustic qualities of old as well as the modern conveniences of the present. Rustic and Main will be a place where those can come together. I am currently prototyping designs for rings using various woods and materials to provide something truly unique and lasting. The method of making rings in this article is fine for the occasional wearer, but they are unfortunately more fragile (as I have experienced over time) and thus I am working on a bentwood technique for crafting the rings.
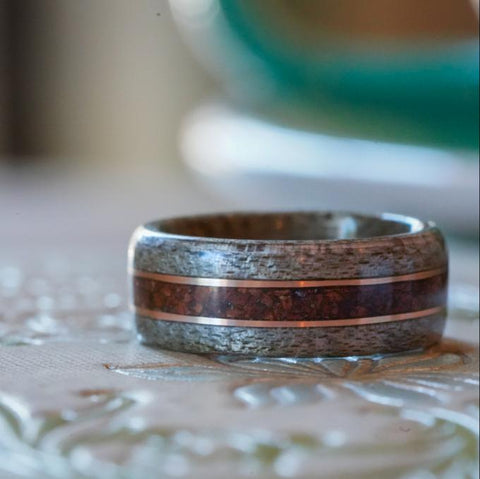
Antique, Historic, and Heirloom Woods
Rustic and Main will feature centuries, and sometimes millenia, old woods that have a unique history and story. The rings will serve as a token, connecting us to those old stories and places. I will likely introduce whiskey barrel rings and other woods that have some significance apart from the aesthetic qualities of the wood itself. I’m excited and can’t wait to show you what I’m up to! Give Rustic and Main a follow on our social channels to see some ring making progress!
Here are a few of the rings we have created thus far:


Rustic and Main: https://rusticandmain.com
Instagram: https://instagram.com/rusticandmain
Facebook: https://facebook.com/rusticandmain
Twitter: https://twitter.com/rusticandmain

